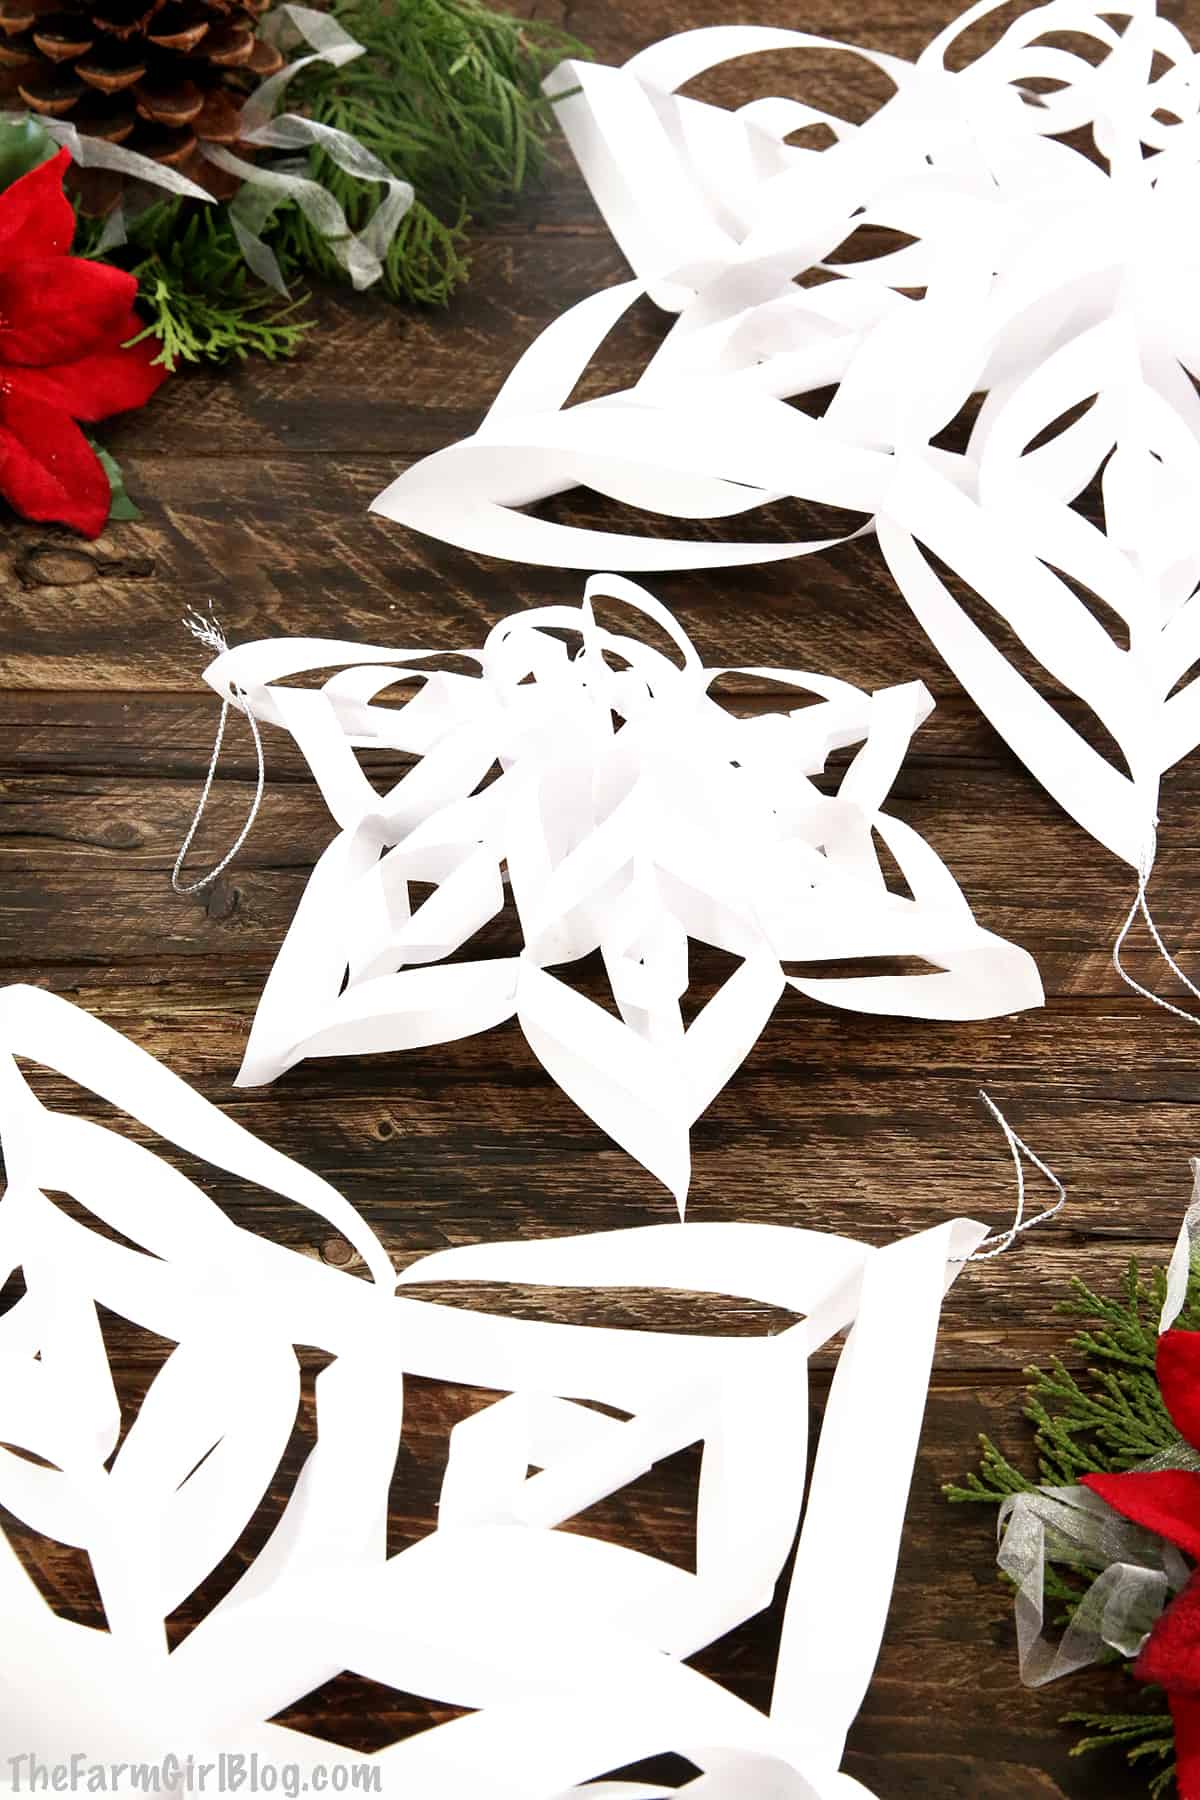
If you're looking for a fun activity for the kids during the holiday season, then you have got to learn how to make 3D paper snowflakes! 3D paper snowflakes are a delightful, creative, and cost-effective way to bring a touch of winter magic into your home, especially during the holiday season.

Derived from the traditional art of paper folding or origami, these three-dimensional decorative pieces mimic the unique and intricate design of snowflakes.
Unlike their two-dimensional counterparts, their structure lends a more realistic, tangible feel. They are crafted from simple materials like paper, scissors, and glue, yet the results are stunningly sophisticated.
The beauty of these DIY projects is that they are customizable, allowing you to explore different sizes, colors, and complexities. Moreover, they are an engaging activity for all ages, perfect for family-crafting sessions.
Keep reading to learn exactly how to make these 3D paper snowflakes!
Table of Contents
Why This is a Fun Activity for Kids
Discover why this fun activity is becoming the go-to choice for kids everywhere. It's not just about keeping them busy, it's about stimulating their minds and promoting creativity, learning, and growth.
This activity provides an environment where children can explore, experiment, and express themselves in a safe and engaging way. The beauty of this activity is its versatility. It creatively caters to a wide range of interests, from art and science to sports and adventures, ensuring it appeals to every child's unique passions.
Moreover, it promotes crucial skills such as problem-solving, critical thinking, teamwork, and communication. These skills are not only important for their current development, but also for their future.
The added benefit of this fun activity is that it encourages physical activity, ensuring children stay active and healthy.
In a world increasingly dominated by screens, this fun activity provides a much-needed break, offering kids the chance to dive into a world of imagination and fun. So, let your kids explore this fun activity, where learning and enjoyment go hand in hand.
What You Need to Make 3D Paper Snowflakes
All you need are some simple craft supplies to make 3D paper snowflakes. Let's look at each of them in more detail:
White paper: You can use some white copy paper or construction paper to make these easily at home.
Scissors: A pair of sharp scissors is essential to cut intricate designs and ensure clean lines.
Glue stick and tape: Glue or double-sided tape is needed to assemble your snowflake pieces together.
Hole puncher: You'll also need some hole puncher to easily punch holes to hang these beauties.
Ornamental strings: Lastly, a piece of string, ribbon, or fishing line will come in handy if you plan to hang your snowflakes.

How to Make 3D Paper Snowflakes (Step-by-Step)
Let's look at how to make 3D paper snowflakes step by step:
How to Fold 3D Snowflakes
To start, you will need six pieces of paper for a 22-inch diameter snowflake.
Fold and cut a square from the 8.5 x 11-inch sheet of paper. Then fold the square into a triangle by folding in half once and then fold the formed triangle in half again to form a smaller triangle.
How to Cut out the 3D Snowflakes
Cut four slits in the triangle starting at the hypotenuse edge. Make sure the folded edge remains uncut. Keep about the same distance between each cut.
How to Make 3D Paper Snowflake Pedals
Next, unfold the cut into a strip triangle. Smear some glue on one edge of the small square. Fold one of the top corners of the paper strip over until the edges line up. Press and hold for the glue to dry out a bit.
Then flip the snowflake petal over and repeat the same steps as above.
Continue turning the paper snowflake petal and joining the paper strips together on the opposite sides in the same process until all paper strips have been joined.
Repeat the same steps with the remaining five pieces of paper.
How to Assemble 3D Paper Snowflakes
To assemble, glue together one petal at a time and allow a few seconds for the glue to dry by keeping glued paper pinched together.
I personally prefer using glue instead of a stapler and tape because the snowflake looks more real with outshining tape and visible staples.
Continue by repeating the same instructions for attaching snowflake petals to the petals.
How to Attach an Ornament String to a Snowflake
Attach a small amount of tape to the tip of any snowflake petal. Punch a hole and tie the ornament string.

You can make 13" and 8" snowflakes in diameter as well.
For step-by-step video instructions, watch the video below!
Video Instructions on How to Make 3D Paper Snowflakes
If you enjoyed this video, please Subscribe to my YouTube channel, be sure to click the Bell icon so you can be the first to know of a new video release!
Tips for Making the Best 3D Paper Snowflakes
Creating beautiful, intricate, and personalized three-dimensional (3D) paper snowflakes can be a fun and rewarding craft project for individuals of all ages. Here are tips to make the best ones:
Choose the right materials: The first tip to create a stunning paper snowflake is choosing the right materials. Opt for a high-quality paper that is both sturdy and flexible, such as construction paper or even origami paper.
Master the art of folding and cutting: The next tip is to master the art of folding and cutting.
Use sharp scissors: Precise folds and sharp, clean cuts are crucial to achieving that intricate snowflake design. A good pair of scissors is crucial here.
No two snowflakes are the same: It's okay for there to be a little variation between each of the 3D snowflakes. Remember, no two snowflakes are identical, so don't be afraid to let your creativity shine.
Consider adding sparkles: Finally, consider adding a touch of sparkle with glitter or sequins. This can transform your paper snowflakes into dazzling, eye-catching decorations.
With these tips, you can create beautiful, one-of-a-kind paper snowflakes that are guaranteed to brighten up any winter day.

Similar Post You Will Love
How to Make 3D Paper Snowflakes (Perfect for the Holidays!)
Materials
Supplies You'll Need to Make the 3D Paper Snowflake
- 8 - white copy paper or construction paper
- 1 - scissors
- 1 - glue stick
- 1 - tape
- 1 - hole puncher
- 3 - ornament strings
Instructions
Folding the 3D Snowflake Instructions
- You will need 6 pieces of paper for a 22-inch diameter snowflake.
- Fold and cut a square from the 8.5 x 11-inch sheet of paper. Then fold the square into a triangle by folding in half once and then fold the formed triangle in half again to form a smaller triangle.
Cutting out the 3D Snowflake Instructions
- Cut four slits in the triangle starting at the hypotenuse edge. Make sure the folded edge remains uncut. Keep about the same distance between each cut.
How to make the 3D Paper Snowflake Petals
- Unfold the cut into a strip triangle. Smear some glue on one edge of the small square. Fold one of the top corners of the paper strip over until the edges line up. Press and hold for the glue to dry out a bit.
- Then flip the snowflake petal over and repeat the same steps by placing
- Continue turning the paper snowflake pedal and joining the paper strips together on the opposite sides in the same process until all paper strips have been joined.
- Repeat the same steps with remaining 5 pieces of paper.
3D Paper Snowflake Assembling Instructions
- Glue together one pedal at a time and allow a few seconds for the glue to dry by keeping glued paper pinched together. I prefer using glue instead of stapler and tape because the snowflake looks more real with outshining tape and visible staples.
- Continue by repeating the same instructions attaching snowflake petal to petal.
How to Attach an Ornament String onto Snowflake
- Attache a small amount of tape onto the tip of any snowflake petal. Punch a hole and tie the ornament string.
Notes
Thank you for following me on Facebook, Instagram, and Pinterest!
Leave a Reply